In this post, we will show you how to generate AI images in 10 lines of Python. For that purpose, we will be using the Huggingface diffusers library
We will show you a straightforward use of the diffusers in Colab. If you are new to this, don’t worry because we designed this tutorial for beginners! We’ll guide you through each step of the process, explaining everything along the way.
By the end of this post, you will have gained a basic understanding of how to use diffusers in Colab.
Google Colaboratory is often called Google Colab. It is a cloud platform. It lets users write and run Python code in the browser. Data scientists and AI enthusiasts love it. It’s very popular among them. This is because it provides a strong and flexible platform for running machine learning and data analysis code. Also, Google Colab is free. It gives access to computing resources, including GPUs. This makes it a low-cost choice for intensive computations.
Click here if you want to know more about how to use Google Colab
Getting Started with Diffusers in Colab
To start with Google Collaboratory Notebook, first log in to your Google account. Then, go to this link: https://colab.research.google.com.
Once logged into Google Colab, you need to connect to a GPU environment to do that:
- click on the small down arrow icon, just beside the Connect button, and go to the “Change runtime type” option.
- In the dialog box, select the “T4 GPU” radio button, and then click on the “Save” button. This will reinitialize a session for us, but, now with GPU computational resources.
Once connected to a GPU environment you can start the process of creating an Artificial intelligence image with 10 lines of code:
Install the necessary libraries by running the following commands:
!pip install diffusersThe command !pip install diffusers is used to install the ‘diffusers’ Python package in your environment. ‘pip’ is a package management system that allows you to install and manage additional libraries and dependencies that are not included in the standard Python library. ‘Diffusers’ is the name of the package you are installing.
The ‘diffusers’ library is a Python package that is used for the simulation and design of optical diffusers. It consists of a set of tools and functions that allow users to model and manipulate light diffusion processes. These tools can be used to generate artificial intelligence images using standard diffusion models.
Import the required libraries:
from diffusers import DiffusionPipeline, EulerAncestralDiscreteScheduler import torchThe line imports two classes from the ‘diffusers’ library: DiffusionPipeline and EulerAncestralDiscreteScheduler.
DiffusionPipeline is a class. It handles the whole process of running a diffusion simulation. This includes setting it up, running it, and collecting the results.
EulerAncestralDiscreteScheduler is a scheduler and it is related to the method of calculating the diffusion process. Euler’s method is a numerical procedure for solving ordinary differential equations with a given initial value. In the context of a diffusion-based image generator, it is used to schedule the progression of the image generation process.
The line import torch is used to bring the PyTorch library into your program. PyTorch is an open-source machine learning library for Python, used for applications such as natural language processing. It is primarily developed by Facebook’s artificial intelligence research group. By importing Torch, you’re allowing your program to utilize the functionalities provided by the PyTorch library.
Load a pre-trained diffusion model using the DiffusionPipeline class
pipe = DiffusionPipeline.from_pretrained('tensor-diffusion/Dark-Sushi-2.5D',torch_dtype=torch.float16)The DiffusionPipeline class is the simplest and most generic way to load the latest trending diffusion models from the Huggingface Hub
In this line of code, we are calling the from_pretrained function. This function loads a pre-trained model from the Huggingface Hub. In this example, it is loading specifically the ‘Dark-Sushi-2.5D’ model from the ‘tensor-diffusion’ repository. This model is loaded into the DiffusionPipeline object pipe.
The from_pretrained method accepts different parameters. In this example, the parameter torch_dtype=torch.float16 sets the data type for the resulting tensor as float16. This is a floating point type that uses less memory and computational resources than the standard float32 type, and it is better suited for the free version of Google Colab that is limited to 16 GB of GPU Ram
Set the scheduler:
pipe.scheduler = EulerAncestralDiscreteScheduler.from_config(pipe.scheduler.config)In this line of code, we are setting the scheduler of the pipe object (which is an instance of DiffusionPipeline) to be an instance of EulerAncestralDiscreteScheduler
The EulerAncestralDiscreteScheduler.from_config() method creates an instance of EulerAncestralDiscreteScheduler. It does this using the configuration from another scheduler. This allows for easy replication of scheduler settings.
The pipe.scheduler.config is accessing the configuration of the current scheduler in the pipe object. This configuration contains all the settings and parameters of the scheduler. By passing this to EulerAncestralDiscreteScheduler.from_config(), we are creating a new scheduler that has the same settings as the current one.
Move the pipe to the GPU:
pipe.to("cuda")The line of code pipe.to(“cuda”) is used to move the pipe object (which contains our diffuser model) to the GPU memory for faster computation. “Cuda” refers to Nvidia’s CUDA. CUDA is a platform and interface for parallel computing. It allows software to use Nvidia graphics cards for non-graphical tasks. When you’re working with large amounts of data and complex computations (as is often the case in machine learning), using the GPU can speed up your program.
Define the input prompt and the negative prompt that will guide the image generation process
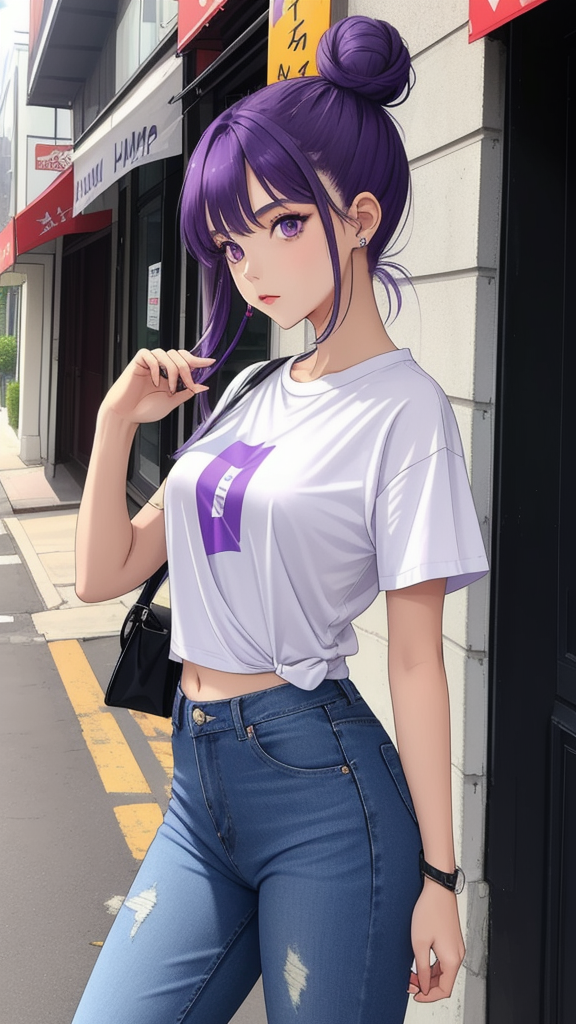
prompt = "masterpiece, best quality, (1girl), woman, small breasts, slim body, full body, purple hair, double bun, long hair, light purple eyes, white plain t-shirt, short blue jeans"
negative_prompt = "nude, bad anatomy, blurry, fuzzy, extra legs, extra arms, extra fingers, badly drawn hands, poorly drawn feet, disfigured, out of frame, tiling, terrible art, deformed, mutated, CGI, octane, render, 3d, doll"
In these 2 lines of code, we are defining a prompt variable that will hold the text of our prompt and a negative_prompt that will keep the negative prompt values for our image generation.
With the model loaded and the input prompt defined, we can now generate the AI image
images = pipe(prompt=prompt, negative_prompt = negative_prompt, height=1024, width=576, guidance_scale=7, num_inference_steps=30).images[0]This is the line of code when the actual inference of the image happens.
This line of code generates an image using the artificial intelligence model. Here’s a breakdown:
- pipe(prompt=prompt, negative_prompt=negative_prompt, height=1024, width=576, guidance_scale=7, num_inference_steps=30) calls the model to generate an image. The parameters given are:
- prompt: This is the text that guides the generation of the image. The model uses this text to understand what to generate.
- negative_prompt: This is the text that guides what the model should avoid generating in the image.
- height and width: These specify the dimensions of the generated image.
- guidance_scale: This is a parameter that determines how strongly the prompt guides the image generation process. A higher number means the prompt has a stronger influence.
- num_inference_steps: This determines the number of steps the model takes to generate the image. More steps could lead to a more refined image but it would take longer to generate.
- .images[0] takes the first (and in this case, only) image generated by the model. The result is stored in the images variable.
Show the generated AI image in Python:
imagesIn this last line of code, we are telling the program to show our generated image in the colab interface.
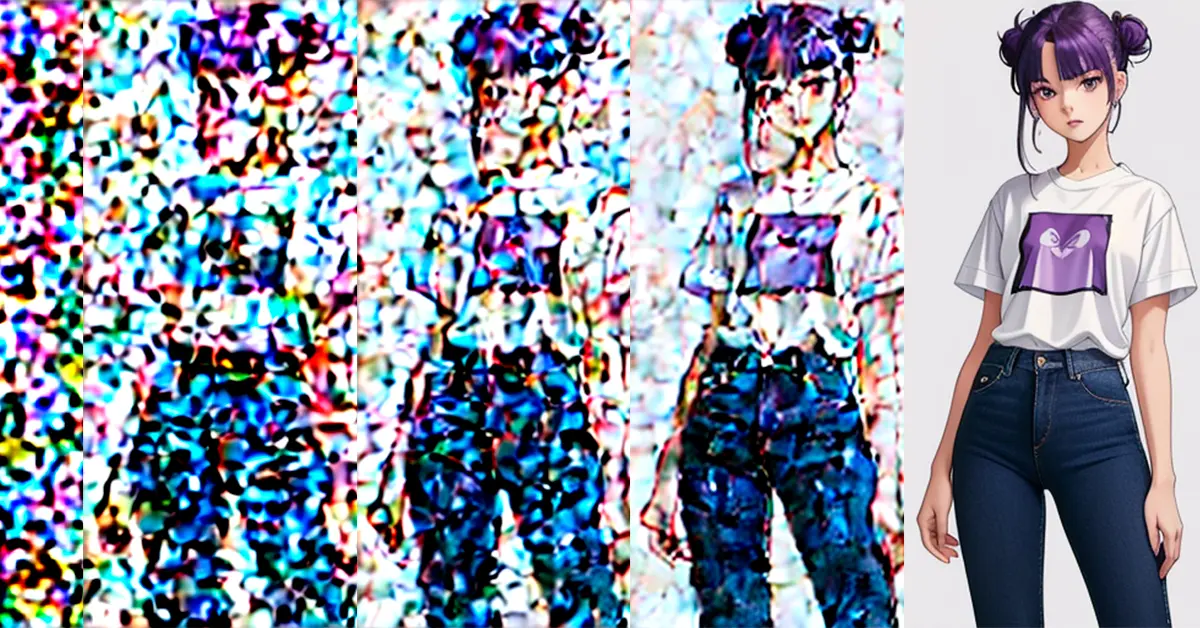
The result should be an AI image in Python similar to this one:
Conclusion
In conclusion, we’ve walked you through the basic steps to generate an AI image using the diffusers library in Google Colab. This guide is perfect for beginners who are just getting started with AI image generation. As you can see, with just a few lines of code, you can create stunning images using AI!
You can find the complete code for generating an AI image using the diffusers library in our GitHub repository. We encourage you to check it out, experiment with it, and use it as a basis for your own AI image generation projects.
We hope you found this tutorial helpful and we encourage you to experiment with different prompts and settings to create your unique images. This post is just the beginning – we plan to share more in-depth tutorials and guides on creating AI images with diffusers in Google Colab. So, stay tuned for more exciting posts coming soon.
Happy coding!